Monthly Archives: January 2016

esp8266 ws2812b hostname triggered wifi light

Today I built a small wifi light which rotates in case a certain hostname (my smartphone) is in the local wifi. As these devices tend not to answer to ping or arp requests, and bonjour or mDNS where to slow, I crawl my dhcp server every five to ten seconds. Additionally i decreased the lease time of the dhcp to  improve the switch off response time. As my smartphone usually logs into my wifi instantly when I enter the house it’s usually switches on before the main door has been opened.

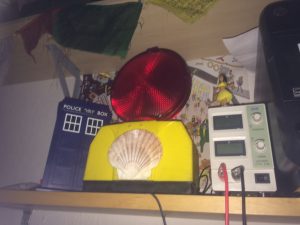
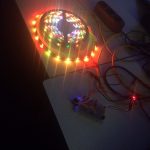
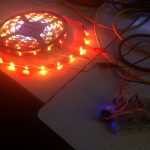
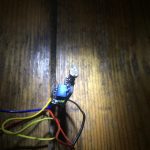
The interior of the lamp consists of seventeen ws2812b rgb leds which I controlled in an intermediate stage with the esp2866 opc code on github. As this would have required a constant network packages flow and a device delivering the UDP packages, I later on switched over to control the led animation by the esp8266.

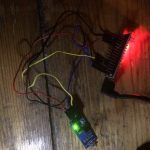
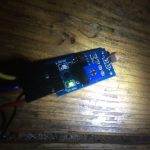
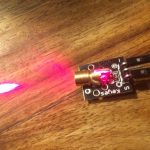
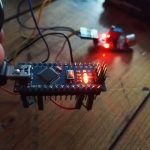
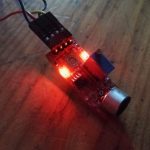
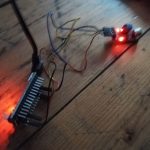
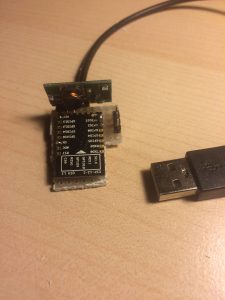
Something I discovered today is that soldering the 2mm grid esp8266 upside down onto a 2.54 grid prototyping circuit board improves handling and speed, as well as the size of the final circuit.  You also can see the pin map information on the final product, which is nice.

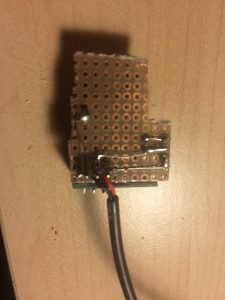
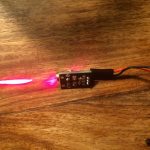
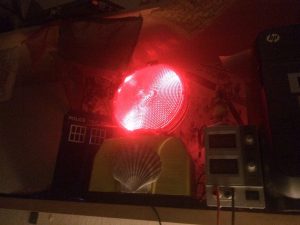
After putting some hot glue on the board to prevent shorts and improve lifetime, I took some measurements regarding current consumption: about 0,1Amps at 5V, which should result to 0.5W with a constant rotating light and wifi crawling. This makes the device capable to be run on most USB power providers. The final result looks like this in action:

Youtube

As the code is very specific and dependent on my local setup, I will not post it on github this time. Just one thing I would have found really helpful to find in the internet while I was struggling with a constantly without information resetting esp8266 would have been this:

Howto grab and parse a HTTP.Auth protected website with the esp8266 as a client:

bool getPage() {
  bool foundHost = false;

  WiFiClient client; //initialising the client globally leads to crashes

  if (client.connect(http_site, 80)) { //the more common version !client.connect() crashes 

    // We now create a URI for the request
    String url = "/dhcp";
    
    // This will send the request to the server
    client.print(String("GET ") + url + " HTTP/1.1\r\n" +
                 "Host: " + http_site + "\r\n" +
                 "Authorization: Basic YWRTeW4kYWRmaW4=\r\n" + //this is Http.Auth as a Client (Base 64)
                 "Connection: close\r\n\r\n");
    delay(500); // you'll need to wait until repsonse
    String line = "";
    // Read all the lines of the reply from server and print them to Serial
    while (client.available()) {
      line = client.readStringUntil('\r');
      //Serial.print(line);
      if (line.indexOf(hostname) != -1) {
        foundHost = true;
        break;
      }
    }
  } else {
    Serial.println("connection failed");
  }
}

In conclusion, this was a nice little project I really enjoyed doing in a sleepless night 🙂 And with about 10€ plus the lamp I got as a gift a long time ago, not that expensive.

Controlling ws2812b with an esp8266 by open-pixel-control protocol

Harder than it looks but controlling an 5m led stripe using the esp8266 by the open pixel control protocol took me a night (and might be the reason for extra bad english as i write this post directly after it). But it’s real fun!

There are several ways to make the controller blink, the easiest way is shown here:

while true; do ( echo -en '\x00\x00\x02\xA6'; dd if=/dev/urandom bs=678 count=1 status=none ) | ncat --send-only --udp 172.22.99.155 2342; sleep 0.1; done

For the duration of infintiy, it sends the static header consisting of 4 bytes ( prio, command and checksum) followed by 8bit red 8bit green and 8bit blue for each led of the stripe. It gets the blinking values by asking the source of random in linux.  It lacks a bit of white as my power source got to its limits, so if you reimplement this use 5V and 1A per 30 leds.

Another thing to mention is the data length field which are bytes 3-4 of the header or \x02\xA6 as in the command above. This length needs to equal the amount of leds times three, so in this example 226 Leds where controlled as the bytes in network order end up to be 678.

This results in that little animation:

Youtube Video

Another possibility is to send these packets by a small python script like that:

import socket
import time

from struct import *

HOST = 'your-hostname'    
PORT = 2342              
colors = [(255,255,255), (255,0,0) ,(0,0,255), (0,255,0)  ]


for color in colors:
        print "sending color {} {} {}".format(color[0],color[1],color[2])
        data = [pack('b',0),pack('b',0), pack('!h',678)];

        for i in range(0,226):
                data.append(pack('BBB',color[0],color[1],color[2]))

        s = socket.socket(socket.AF_INET, socket.SOCK_DGRAM)


        for i in range(0,1024):
                s.sendto("".join(data),(HOST,PORT))

        time.sleep(0.5)
        s.close()

import pdb; pdb.set_trace()

Code for the controller at github.

5V Light Detector analog / digital ‘Flying Fish – MH Sensor Series”

Took me a while to find the purpose of this little device I had in the mail recently. it’s a light detection sensor, which I connected to the arduino nano to test its functionality. it servs the amount of light from 0 (very bright) to 1024 (very dark) using the analog pin. To use this device with the ESP8266 you’ll probably need to adapt the voltage and transform it between 0-1V.  But for now, it works fine costing around 2 EUR 🙂

 void setup ()
int sensorPin = A0; // select the input pin for the potentiometer
int ledPin = 13; // select the pin for the LED
int sensorValue = 0; // variable to store the value coming from the sensor
 
void setup () 
{
  pinMode (ledPin, OUTPUT);
  Serial.begin (9600);
}
 
void loop () 
{
  sensorValue = analogRead (sensorPin);
  digitalWrite (ledPin, HIGH);
  delay (sensorValue);
  digitalWrite (ledPin, LOW);
  delay (sensorValue);
  Serial.println (sensorValue, DEC);
}

Output looks like this (analog):

21 -> bright
90
68
63
81
81
83
89
78
85
99
558
897
822
882
864 -> dark

5V 5mW Laser Sensor Module for Arduino 650nm

Ok, calling it a sensor is a bit off… as it only is cabable of beeing turned on and off again. Measurements for a 0.85 EUR device would be a real surprise, but hey – the cats still love the beam which is easily mountable to an robotic arm consisting of two 28-BYJ stepper motors 🙂

 void setup ()
 {
   pinMode (13, OUTPUT); 
 }

void loop () {
    digitalWrite (13, HIGH); / / open the laser head
    delay (1000); / / delay one second
    digitalWrite (13, LOW); / / turn off the laser head
    delay (1000); / / delay one second
 }


Arduino microphone sensor analog + digital

I tried a small arduino microphone recently:

int sensorPin = A0; // select the input pin for the potentiometer
int ledPin = 13; // select the pin for the LED
int sensorValue = 0; // variable to store the value coming from the sensor
 
void setup () 
{
  pinMode (ledPin, OUTPUT);
  Serial.begin (9600);
}
 
void loop () 
{
  sensorValue = analogRead (sensorPin);
  digitalWrite (ledPin, HIGH);
  delay (sensorValue);
  digitalWrite (ledPin, LOW);
  delay (sensorValue);
  Serial.println (sensorValue, DEC);
}

Output looks like that:

22
20
22
22
22
21
22
22
21
22
22
22
22
22
22
22
21
22
22
21


Well explaination how sound sensors work:

Youtube Video