Tag Archives: video

Controlling ws2812b with an esp8266 by open-pixel-control protocol

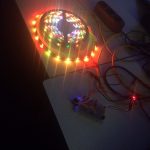
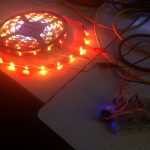
Harder than it looks but controlling an 5m led stripe using the esp8266 by the open pixel control protocol took me a night (and might be the reason for extra bad english as i write this post directly after it). But it’s real fun!

There are several ways to make the controller blink, the easiest way is shown here:

while true; do ( echo -en '\x00\x00\x02\xA6'; dd if=/dev/urandom bs=678 count=1 status=none ) | ncat --send-only --udp 172.22.99.155 2342; sleep 0.1; done

For the duration of infintiy, it sends the static header consisting of 4 bytes ( prio, command and checksum) followed by 8bit red 8bit green and 8bit blue for each led of the stripe. It gets the blinking values by asking the source of random in linux.  It lacks a bit of white as my power source got to its limits, so if you reimplement this use 5V and 1A per 30 leds.

Another thing to mention is the data length field which are bytes 3-4 of the header or \x02\xA6 as in the command above. This length needs to equal the amount of leds times three, so in this example 226 Leds where controlled as the bytes in network order end up to be 678.

This results in that little animation:

Youtube Video

Another possibility is to send these packets by a small python script like that:

import socket
import time

from struct import *

HOST = 'your-hostname'    
PORT = 2342              
colors = [(255,255,255), (255,0,0) ,(0,0,255), (0,255,0)  ]


for color in colors:
        print "sending color {} {} {}".format(color[0],color[1],color[2])
        data = [pack('b',0),pack('b',0), pack('!h',678)];

        for i in range(0,226):
                data.append(pack('BBB',color[0],color[1],color[2]))

        s = socket.socket(socket.AF_INET, socket.SOCK_DGRAM)


        for i in range(0,1024):
                s.sendto("".join(data),(HOST,PORT))

        time.sleep(0.5)
        s.close()

import pdb; pdb.set_trace()

Code for the controller at github.

DIY WLAN sauna thermometer for 10 EUR with ESP8266 and DS18B20

I recently built an WLAN Thermometer which needed to be partly whaterproof and support temperatures under 0 and over 85 degrees celsius. Therefore the usual temperature measurement chips like DHT11 or LM35 couldn’t be used, especially as the surrounding circuits might be damaged by the steam of the sauna environment. After a while I found the DS18B20, which has an metalic and whaterproof end and perfectly matches the requirements. In china the one-wire-supporting chip currently costs around 2 USD and comes with a 1m whaterproof cable.

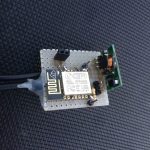
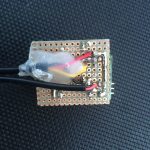
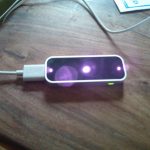
The ESP8266 works with 3,3 Volts which isn’t very common among my old power adapters which is why I soldered a chinese version of the AMS1117 (an Lm2596 step down controller) on the board, which enables the setup also to be run by USB cable as you can see on the pictures.

Screenshot_2015-12-30_16-26-31For the webinterface I wrote a small external javascript file, which gets called by the esp8266 on most web requests. It fetches the temperature by json and visulizes it with d3.js in real time. The scales fit to the measured temperature and time automagically. It further is possible to display the site on multiple clients without loosing data or performance.
That was my useful christmas holiday project 🙂

Code on github.com

Making Robots Talk and Video

Today I watched a really nice talk about making robots. It’s worth every minute and ideal to dive into the current issues of current robotics by showing different approaches to solve common problems. Therefore the participants are:

  • Russ Tedrake Director, Center for Robotics, MIT Computer Science and Artificial Intelligence Lab
  • Sangbae Kim – MIT Biomimetic Robotics Lab
  • Mick Mountz – Founder, Kiva Systems
  • Gill Pratt – Program Manager, DARPA Robotics Challenge, DARPA Defense Sciences
  • Marc Raibert – Founder, Boston Dynamics
  • Radhika Nagpal – Self-organizing Systems Research and Robotics Group, Harvard University

Youtube Video

LeapMotion and ROS

Today I’ve got the chance to get my hands on a Leap Motion. As it uses depth information to track hands on a short range from the device and as there is a ros driver package existing for it, I hoped to get a 3D PointCloud. It costs about 80€ and could have been a cheap replacement for the [amazon &title=Xtion&text=Asus Xtion].

Unfortunately its not possible (yet?) – here is a very nice post why.

But it is fun anyways to get both hands tracked:

Youtube Video

The ros driver interfaces ros with only one hand – but we could do something like shown below to control the amosero:

Youtube Video

Later it would be a nice way to control a robot arm – but for now we leave that nice little device as there is a lot of other stuff to be done.

Raspberry Pi Robot #2

I’ve connected the [amazon &title=Raspberry Pi&text=Raspberry Pi] to an L298N and two 6V DC Motors, which have been in the Makeblock Starter Kit. I’ve had some issues with the WPA2 Enterprise TLS Network, which is why there is an cable attached.

IMG_20140521_164828

I’ve also written a small geometry/Twist controller for ROS-compatibility,for controlling the robots movement with keyboard interop like I did before.

Before I dismantle this little robot, I’ve like to share a little video:
Youtube Video

As soon as possible I will use the arduino micro and the two 250rpm stepper motors – for that I am planning to use a Arduino Motor shield that I’ve already ordered.

Rasberry Pi Robot with ROS, Xtion and working base_controller teleop

Before I dismantle my little [amazon &title=Raspberry Pi&text=Raspberry Pi] Robot #1 , I wanted to have a little video of its base_controller working together with the turtlebot teleop. It uses the geometry/Twist messages to transmit moving information like a lot of ROS Robots do.

Youtube Video

As you see there is a little acceleration control implemented which makes the robot start smoothly and stop after gently after no key is pressed anymore. In case of emergency its possible to hit e.g. the space bar for a instant full stop.

This robot isn’t very fast – but the next one will be. So this was a successful ROS-learning robot which I can recommend to everyone who wants to know how ROS Robots work.
Its a bit hard to get all of the source compiled on the small arm cpu, and there are nearly no precompiled packages – but it takes away all the fear from compiling errors in the future 🙂