Category Archives: esp8266

How to set up Arduino IDE for esp8266 programming

The Arduino (or in some cases also Genuino) is a physical hard and software development plattform. During the recent years its developing environment grow to a useful and library rich developing platform. Because of that the esp8266 team created an conversion tool to its internal programming language lua.

Setting up the Arduino IDE for esp8266 programming is really easy. Just follow this small guide.

Step 1: Download the arduino IDE software

Go to the most recent version download page of the Arduino IDE. Please keep in mind that you’ll need at least version 1.6.x. In some cases it is not available at the packet repositories of your beloved Debian Distribution.

screenshot-from-2016-12-28-15-22-44Click on Windows, Linux or Mac Version of your choice. We are going to use the Linux 64bit for further pictures.

screenshot-from-2016-12-28-15-24-53Extract the provided tar.gz. For windows or Mac please use a extraction software like 7zip, Winrar etc accordingly.

screenshot-from-2016-12-28-15-28-32Please make sure the arduino.sh file in your directory is excecutable.

screenshot-from-2016-12-28-15-28-49

screenshot-from-2016-12-28-15-29-01You also can use the terminal command:

chmod +x -/arduino.sh

After that double click the application…

screenshot-from-2016-12-28-15-33-03or use the terminal to start the IDE. This is also very useful to see possible errors after they occure while flashing the esp8266 from time to time.


screenshot-from-2016-12-28-15-33-21

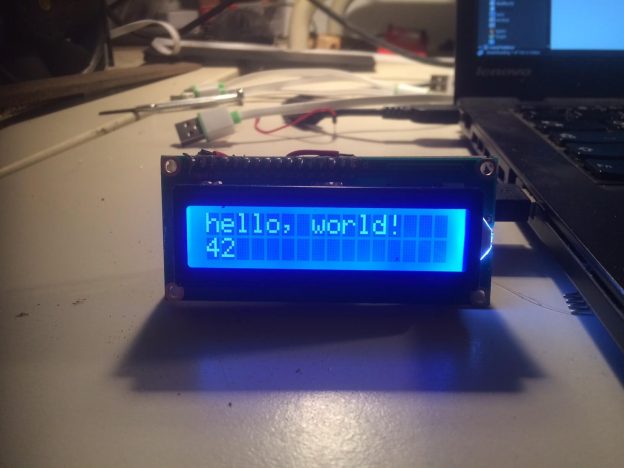
Et voila, your IDE should look somehow like this:

screenshot-from-2016-12-28-15-34-45

Step 2: Setting up the IDE to work with ESP8266 by board manager.

We need to add an additional url to the boards manager sources list. For that open File > Preferences

screenshot-from-2016-12-28-15-37-55

And add http://arduino.esp8266.com/stable/package_esp8266com_index.json  to the Additional Boards Manager URLs.

screenshot-from-2016-12-28-15-38-25After that open Tools > Boards > Boards Manager and search for esp8266.

screenshot-from-2016-12-28-15-39-28

install the latest version:

screenshot-from-2016-12-28-15-40-02

After that you should be able to select the Generic ESP Module board in Tools > Board

screenshot-from-2016-12-28-15-41-22

screenshot-from-2016-12-28-15-42-15Congratulations! You are now able to compile esp8266 code from the arduino IDE.

Step 3: Use the Examples to learn to code

This step is easy. Open File > Examples > ESP8266Wifi > WifiWebServer as a good starting point.

screenshot-from-2016-12-28-18-12-55

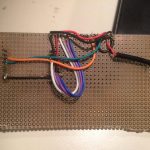
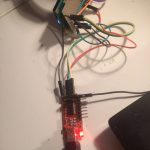
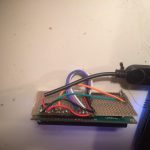
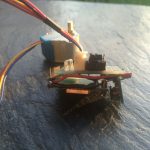
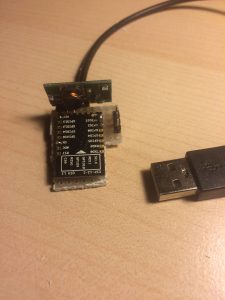
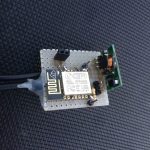
In the next post we will have a look at how to wire the ESP8266 up for an easy flashing.

Building a wifi LiquidCrystal-Display esp8266 for less than 10 EUR

As planned, I now built and esp8266 version of the display. Because the breadboard version was working quite well from the start, I decided to build a more permanent version.  The 5V of the USB Cable (or any other 5V Source) gets stepped down by a LM2596 circuit in a Fp6190 I purchased some time ago. This is a quite cheap and energy efficient solution. The complete setup requires about 70mA at 5Vs. This surely can be optimized by dimming the brightness of the display. In case you want to build your own wifi LiquidCrystal-Display esp8266 use the details provided below and check the code on Github. Happy hacking!

Parts List

  • 2,00€ ESP8266 12-Q
  • 2,00€ Fp6190 5V to 3.3V step down converter
  • 1,50€ LiquidCrystal-Display Blue
  • 1.6kOhm resistor or 10k potentiometer
  • prototyping board
  • cables
  • pins


Wiring

 LCD    -> ESP8266 12-Q
 following pinmap http://arduino.esp8266.com/versions/1.6.5-1160-gef26c5f/doc/esp12.png
  --------------------------
  1|VSS| -> USB GND
  2|VDD| -> USB 5V +5v
  3|VO | -> USB GND pin + 1,6k ohm Resistor
  4|RS | -> ESP2866  pin 4
  5|RW | -> ESP2866 GND
  6|E  | -> ESP2866 pin 5
 11|D4 | -> ESP2866 pin 13
 12|D5 | -> ESP2866 pin 12
 13|D6 | -> ESP2866 pin 14
 14|D7 | -> ESP2866 pin 16
 15|A  | -> GND + no or a below 10k Resistor  to dimm background light (Backlight power)
 16|K  | -> USB GND (Backlight ground)

Code

This time on GitHub.


28BYI-48 stepper motor with Wifi - final setup

Controlling a 28BYI-48 stepper motor with Wifi for less than 10$ USD by using an esp2866 12-q

For low cost robots, remote controlled laser pointers, cat or fish feeding machines I found a really cheap way to move things by programmable wifi. The already handy usable 28BYJ-48 coming small motor driver i board is  available in china for about 2$. It additionally needs to be driven by a fast micro controller like the Arduino or the much more capable Raspberry Pi.  As I was experimenting with the esp2866 12-Q recently, the combination of this two useful things seemed more than obvious.  Therefore I decided to give it a try.

Unfortunately the stepper motor and its driver chip the ULN2003a need at least 5Vs to run, a voltage the esp2866 would by killed by as its maximum rating is about 3.6. in conclusion two power circuits or two power sources would be required. I tried to keep things simple by using an 5V-12V power source and step down converting it to 3.3V with an lm2655 based step down circuit. This setup allows an efficiency about 95% and avoids producing high amounts of heat as linear step down converters would have done. Overall the motor and the controllers consume 0.35 Amps at 5V therefore about 1.75 Watts.

Parts

  • 2$ 28BYJ-48 with ULN2003a motor driver
  • 2$ esp8266
  • 2$ step-down-converter
  • > 0,5$ breadboard 2.5 mm adapter for the esp8266
  • > 0,.5$  for15 cm of additional cables low diameter
  • soldering equipment and an 3.3V FTDI Adapter for flashing the esp2866

Steps to build your own:

  1. solder the esp2866 on the adapter board
  2. reverse the in1 in2 in3 in4 pins to the other side of the motor driver ULN2003a  board
  3. put the breadboard adapter on this pins starting with vcc followed by in1 to in4
  4. connect the v_out of the step down circuit with vcc of the breadboard adapter
  5. connect v_in of the step down circuit to the vcc of the motor driver board
  6. connect all GNDs together
  7. add pins on the breadboard adapter for flasingh the esp2866, GND, VCC, TX and RX
  8. flash the esp2866 with
    https://github.com/PaulPetring/esp2866-28BYJ-48-motor-control/blob/master/simple.ino
  9. test solderinng and apply between 5V an 12V connected to the motor driver board
  10. have fun 🙂

Wiring concept

Video on Youtube

https://github.com/PaulPetring/esp2866-28BYJ-48-motor-control

esp8266 ws2812b hostname triggered wifi light

Today I built a small wifi light which rotates in case a certain hostname (my smartphone) is in the local wifi. As these devices tend not to answer to ping or arp requests, and bonjour or mDNS where to slow, I crawl my dhcp server every five to ten seconds. Additionally i decreased the lease time of the dhcp to  improve the switch off response time. As my smartphone usually logs into my wifi instantly when I enter the house it’s usually switches on before the main door has been opened.

The interior of the lamp consists of seventeen ws2812b rgb leds which I controlled in an intermediate stage with the esp2866 opc code on github. As this would have required a constant network packages flow and a device delivering the UDP packages, I later on switched over to control the led animation by the esp8266.

Something I discovered today is that soldering the 2mm grid esp8266 upside down onto a 2.54 grid prototyping circuit board improves handling and speed, as well as the size of the final circuit.  You also can see the pin map information on the final product, which is nice.

After putting some hot glue on the board to prevent shorts and improve lifetime, I took some measurements regarding current consumption: about 0,1Amps at 5V, which should result to 0.5W with a constant rotating light and wifi crawling. This makes the device capable to be run on most USB power providers. The final result looks like this in action:

Youtube

As the code is very specific and dependent on my local setup, I will not post it on github this time. Just one thing I would have found really helpful to find in the internet while I was struggling with a constantly without information resetting esp8266 would have been this:

Howto grab and parse a HTTP.Auth protected website with the esp8266 as a client:

bool getPage() {
  bool foundHost = false;

  WiFiClient client; //initialising the client globally leads to crashes

  if (client.connect(http_site, 80)) { //the more common version !client.connect() crashes 

    // We now create a URI for the request
    String url = "/dhcp";
    
    // This will send the request to the server
    client.print(String("GET ") + url + " HTTP/1.1\r\n" +
                 "Host: " + http_site + "\r\n" +
                 "Authorization: Basic YWRTeW4kYWRmaW4=\r\n" + //this is Http.Auth as a Client (Base 64)
                 "Connection: close\r\n\r\n");
    delay(500); // you'll need to wait until repsonse
    String line = "";
    // Read all the lines of the reply from server and print them to Serial
    while (client.available()) {
      line = client.readStringUntil('\r');
      //Serial.print(line);
      if (line.indexOf(hostname) != -1) {
        foundHost = true;
        break;
      }
    }
  } else {
    Serial.println("connection failed");
  }
}

In conclusion, this was a nice little project I really enjoyed doing in a sleepless night 🙂 And with about 10€ plus the lamp I got as a gift a long time ago, not that expensive.

Controlling ws2812b with an esp8266 by open-pixel-control protocol

Harder than it looks but controlling an 5m led stripe using the esp8266 by the open pixel control protocol took me a night (and might be the reason for extra bad english as i write this post directly after it). But it’s real fun!

There are several ways to make the controller blink, the easiest way is shown here:

while true; do ( echo -en '\x00\x00\x02\xA6'; dd if=/dev/urandom bs=678 count=1 status=none ) | ncat --send-only --udp 172.22.99.155 2342; sleep 0.1; done

For the duration of infintiy, it sends the static header consisting of 4 bytes ( prio, command and checksum) followed by 8bit red 8bit green and 8bit blue for each led of the stripe. It gets the blinking values by asking the source of random in linux.  It lacks a bit of white as my power source got to its limits, so if you reimplement this use 5V and 1A per 30 leds.

Another thing to mention is the data length field which are bytes 3-4 of the header or \x02\xA6 as in the command above. This length needs to equal the amount of leds times three, so in this example 226 Leds where controlled as the bytes in network order end up to be 678.

This results in that little animation:

Youtube Video

Another possibility is to send these packets by a small python script like that:

import socket
import time

from struct import *

HOST = 'your-hostname'    
PORT = 2342              
colors = [(255,255,255), (255,0,0) ,(0,0,255), (0,255,0)  ]


for color in colors:
        print "sending color {} {} {}".format(color[0],color[1],color[2])
        data = [pack('b',0),pack('b',0), pack('!h',678)];

        for i in range(0,226):
                data.append(pack('BBB',color[0],color[1],color[2]))

        s = socket.socket(socket.AF_INET, socket.SOCK_DGRAM)


        for i in range(0,1024):
                s.sendto("".join(data),(HOST,PORT))

        time.sleep(0.5)
        s.close()

import pdb; pdb.set_trace()

Code for the controller at github.

DIY WLAN sauna thermometer for 10 EUR with ESP8266 and DS18B20

I recently built an WLAN Thermometer which needed to be partly whaterproof and support temperatures under 0 and over 85 degrees celsius. Therefore the usual temperature measurement chips like DHT11 or LM35 couldn’t be used, especially as the surrounding circuits might be damaged by the steam of the sauna environment. After a while I found the DS18B20, which has an metalic and whaterproof end and perfectly matches the requirements. In china the one-wire-supporting chip currently costs around 2 USD and comes with a 1m whaterproof cable.

The ESP8266 works with 3,3 Volts which isn’t very common among my old power adapters which is why I soldered a chinese version of the AMS1117 (an Lm2596 step down controller) on the board, which enables the setup also to be run by USB cable as you can see on the pictures.

Screenshot_2015-12-30_16-26-31For the webinterface I wrote a small external javascript file, which gets called by the esp8266 on most web requests. It fetches the temperature by json and visulizes it with d3.js in real time. The scales fit to the measured temperature and time automagically. It further is possible to display the site on multiple clients without loosing data or performance.

That was my useful christmas holiday project 🙂

Code on github.com