Category Archives: Robotics

5V Light Detector analog / digital ‘Flying Fish – MH Sensor Series”

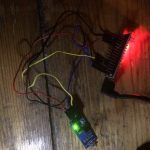
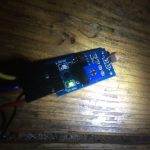
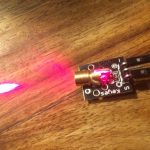
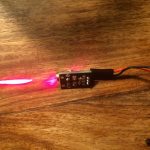
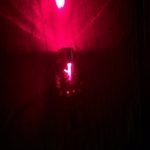
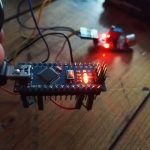
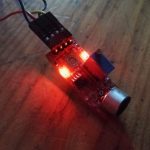
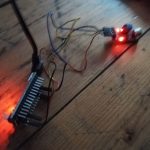
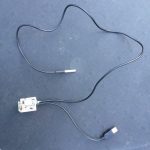
Took me a while to find the purpose of this little device I had in the mail recently. it’s a light detection sensor, which I connected to the arduino nano to test its functionality. it servs the amount of light from 0 (very bright) to 1024 (very dark) using the analog pin. To use this device with the ESP8266 you’ll probably need to adapt the voltage and transform it between 0-1V.  But for now, it works fine costing around 2 EUR 🙂

 void setup ()
int sensorPin = A0; // select the input pin for the potentiometer
int ledPin = 13; // select the pin for the LED
int sensorValue = 0; // variable to store the value coming from the sensor
 
void setup () 
{
  pinMode (ledPin, OUTPUT);
  Serial.begin (9600);
}
 
void loop () 
{
  sensorValue = analogRead (sensorPin);
  digitalWrite (ledPin, HIGH);
  delay (sensorValue);
  digitalWrite (ledPin, LOW);
  delay (sensorValue);
  Serial.println (sensorValue, DEC);
}

Output looks like this (analog):

21 -> bright
90
68
63
81
81
83
89
78
85
99
558
897
822
882
864 -> dark

5V 5mW Laser Sensor Module for Arduino 650nm

Ok, calling it a sensor is a bit off… as it only is cabable of beeing turned on and off again. Measurements for a 0.85 EUR device would be a real surprise, but hey – the cats still love the beam which is easily mountable to an robotic arm consisting of two 28-BYJ stepper motors 🙂

 void setup ()
 {
   pinMode (13, OUTPUT); 
 }

void loop () {
    digitalWrite (13, HIGH); / / open the laser head
    delay (1000); / / delay one second
    digitalWrite (13, LOW); / / turn off the laser head
    delay (1000); / / delay one second
 }


Arduino microphone sensor analog + digital

I tried a small arduino microphone recently:

int sensorPin = A0; // select the input pin for the potentiometer
int ledPin = 13; // select the pin for the LED
int sensorValue = 0; // variable to store the value coming from the sensor
 
void setup () 
{
  pinMode (ledPin, OUTPUT);
  Serial.begin (9600);
}
 
void loop () 
{
  sensorValue = analogRead (sensorPin);
  digitalWrite (ledPin, HIGH);
  delay (sensorValue);
  digitalWrite (ledPin, LOW);
  delay (sensorValue);
  Serial.println (sensorValue, DEC);
}

Output looks like that:

22
20
22
22
22
21
22
22
21
22
22
22
22
22
22
22
21
22
22
21


Well explaination how sound sensors work:

Youtube Video

DIY WLAN sauna thermometer for 10 EUR with ESP8266 and DS18B20

I recently built an WLAN Thermometer which needed to be partly whaterproof and support temperatures under 0 and over 85 degrees celsius. Therefore the usual temperature measurement chips like DHT11 or LM35 couldn’t be used, especially as the surrounding circuits might be damaged by the steam of the sauna environment. After a while I found the DS18B20, which has an metalic and whaterproof end and perfectly matches the requirements. In china the one-wire-supporting chip currently costs around 2 USD and comes with a 1m whaterproof cable.

The ESP8266 works with 3,3 Volts which isn’t very common among my old power adapters which is why I soldered a chinese version of the AMS1117 (an Lm2596 step down controller) on the board, which enables the setup also to be run by USB cable as you can see on the pictures.

Screenshot_2015-12-30_16-26-31For the webinterface I wrote a small external javascript file, which gets called by the esp8266 on most web requests. It fetches the temperature by json and visulizes it with d3.js in real time. The scales fit to the measured temperature and time automagically. It further is possible to display the site on multiple clients without loosing data or performance.

That was my useful christmas holiday project 🙂

Code on github.com

Making Robots Talk and Video

Today I watched a really nice talk about making robots. It’s worth every minute and ideal to dive into the current issues of current robotics by showing different approaches to solve common problems. Therefore the participants are:

  • Russ Tedrake Director, Center for Robotics, MIT Computer Science and Artificial Intelligence Lab
  • Sangbae Kim – MIT Biomimetic Robotics Lab
  • Mick Mountz – Founder, Kiva Systems
  • Gill Pratt – Program Manager, DARPA Robotics Challenge, DARPA Defense Sciences
  • Marc Raibert – Founder, Boston Dynamics
  • Radhika Nagpal – Self-organizing Systems Research and Robotics Group, Harvard University

Youtube Video

Six legs two Motors

Hexbug 477-2423 – Scarab XL


Youtube Video
available on amazon for 25€ 🙂

Goliath tracked mine – one of the first mobile robots

During my thesis I did some research about mobile robots.  Therefore the Goliath tracked mine, or the ‘Leichter Ladungsträger Goliath (Sd.Kfz. 302/303a/303b)’ in German as one of the first mobile robots always fascinated me. Created in the late 1940 and mass produced between 1942 and 1944 about 7500 of this remote cable controlled mobile bases could carry up to 60kgs of high explosives. Way before modern Robots like the iRobot BigDog or its successors this equally sounding robot is powered by two combustion engines.

After some research I figured out that in my area there is the Bundeswehr Military History Museum in Dresden, which is presenting one of this impressive machines. Therefore I went to Dresden an took some photos, which I want to share with you:

Some people also present them in action:

Youtube Video

In case there will be an bigger version of the aMoSeRo this robot might share its physical dimensions with it. Also the track system is impressive and in case its operable upside down really well suitable for heavy duty terrain.

Howto flash an image to Raspberry Pi or Banana Pi using dd and a progressbar

Most tools don’t show reliable progress informationwhen flashing an operating system to an ssd card. In case you use dd to copy, this issue can be solved by the nice pv tool with:

pv -tpreb /path/to/image.img | dd of=/dev/yourUSBorSDSlotTarget bs=1M

which results in:

pvScreenshot21.01.2015

And really lighten up the time when flashing your Pi devices like Raspberry Pi or BananaPi.


Status Update: Calibrating for Depth

Currently I am experimenting with stereo vision usb webcams, where an essential step is good calibration. It felt a bit strange to see the image feature detection working on live data:

Screenshot - 09.11.2014

I’ll try to form the gained experiences into a small step by step guide and probably a github repository soon. Currently I am aiming towards depth data gained by webcams only, especially to compare the results to previous setups, and to see if visual odometry can be an option in low cost environments.