Monthly Archives: June 2014

aMoSeRo – first Simultaneous Planning Localization and Mapping (SPLAM)

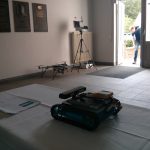
Far from done, but right on the way – the aMoSeRo did his first 2D planning today.  There are still a lot of adjustments needed for the mapping to work properly, but it’s already impressive to see ROS working.

first SPLAM - first navigation through a map

first SPLAM – first navigation through a map

The node graph still grows and will need some changes when used with multiple robots, but organising goes on 🙂

first SPLAM - it is getting even worse, more topics, more nodes

aMoSeRo – very first mapping view available

After days with latex and struggling with all sensor data a mobile robot needs, today is the first day of ROS showing me a small map view. It’s anything but stable and I can’t claim understanding everything – but because I’ve hadn’t something to report for some time now here a small demonstration:

First Mapping Experience

Screenshot fromMAP

ScreenshotTopics Topics Overview – amosero a distributed system still far from optimal

Because my IMU doesn’t do its work as it should, I’ve used a WiiMote Motion + and run it by a common ros driver and bluetooth.

Yeeeha 🙂

aMoSeRo xbox controller support

ROS is amazing. After installing the xbox drivers (xboxdrv) on linux, following some well written instructions and writing about 100 lines of own code – the aMoSeRo is now able to be controlled by an xbox controller.

Driving the robot around the house revealed the real power behind the two RB-35 (1:30). Not to fast to control but very strong driving over piles of books the motors seemed to be a good choice.

Some issues with the wheels – a lot of force beeing at work, especially along the positive and negative y-axis (see REP103 post) will be solved soon by some super glue 🙂

So demonstrating the robot in future will be a lot more easy and controllable – and a lot more fun!


aMoSeRo at Technical University Bergakademie Freiberg Open Day

Today we’ve had the honor to inform young high school students about the education possibilities of the Technical University Bergakademie Freiberg at their Open Day. In four hours I’ve learned howto explain everything about the aMoSeRo in a few sentences. Sadly we weren’t able to drive around because everything was very crowded, but we could demonstrate the 3D PointClouds a bit. So everybody was able to see the mathematics in infomatics by example 🙂

The only chance to take some photos had been before the day started, but here are some impressions:

ROS Hydro/Indigo and sparkfun IMU LSM9DS0 9DOF

I’ve connected the LSM9DS0 9 degrees of Freedom Breakout Board made by sparkfun with an arduino micro like I’ve described in a previous post, wrote a little rosserial sensor_msgs::Imu publisher and visualized everything using the rqt plugin manager for further experimenting.

Here a screenshot while moving the setup:

ScreenshotIMURos

a screenshot while not touching:

ScreenshotIMURos2

As you see all data is still moving a lot. So the next step beside finding out what the units really mean, will be stabilizing by using a kalman filter like its provided in the robot_pose_ekf package.

By the way: the arduino is currently using around 25000 of its 28 672 bytes memory just providing the IMU data to ros. So the motorshield will require another micro or we switch it to something else like an wiimote.

Arduino Micro and 3.3V IMU LSM9DS0 9DOF

Soldering, Soldering, Soldering 🙂 Everything else had been following the amazingly well written guides of the LSM9DS0 made by sparkfun. Nine degrees of freedom at a rate of “a few per second”(currently 9Hz) since I’ve followed just the basic setup without fancy interrupt usage.

One thing thats really important to mention is the different signal voltage level of the SDA and SCL pins between the Micro(5V) and the IMU Breakout Board(3.3V) – which in case you connect them together without bi-directional level shifting, as you might expect since i2c is designed for exactly that, would lead to blue chip burn.

So wiring on the bread board (and not removing the wires used by the arduino motor shield v2, so do not get too confused by that):

IMG_20140612_192126

and applying the library to the arduino IDE, leads to a working live example with 2 outputs per second:ScreenshotIMULSM9DS0So the next step is to increase the rate by improving the setup wiring, parse that data into ROS Hydro by a SensorMsg/Imu publisher,  kalman and combining these with other odom sources like my currently used (and sadly poor)  or even an GPS source to a exact and really usable Odometry by the robot_pose_ekf package for later Simultaneous Localization and Mapping (SLAM) – a real autonomous mapping and navigation. Sounds easy right?

first presentation of aMoSeRo at the BHT Freiberg Germany

Today the BHT which is a mining research forum in Freiberg, Germany took place. As the amosero should run as a support robot in mining somewhen this has been a great chance to firstly show off what we’ve got so far. After 4 weeks from zero to robot:

So we were able to demonstrate the [amazon &title=Asus Xtion&text=Asus Xtion] Features like a live IR Image, some 1fps RGB DepthCloud visualized in RVIZ, driving around including to spot turn.

The plate cookie box we used had some negative effect on the wlan capacity, which we need to address soon by e.g. changing the material or excluding the antenna.

Had been a nice experience showing that little low cost ros robot to public an I am still very exited where the journey leads in the remaining 4 months of my thesis.

Using TU-BAF VPN on Ubuntu with NetworkManager and VPNC

Using the VPN of the Technical University Bergakademie Freiberg on Ubuntu 14.04 and previous version can be really easy. Please check if you are running NetworkManager like you should by default.

Now install the network-manager-vpnc extension by:

sudo apt-get update && sudo apt-get install -y network-manager-vpnc

Using system settings > Network Connections, or the nm-applet (the small network icon in your task bar) > Edit Connections
you should be able to follow this images:ScreenshotNMApplet

ScreenshotAddVPNScreenshotAddVPN2Now set the empty fields to the values below, for user name, choose your default credential:

ScreenshotAddVPN3

click on Advanced button:ScreenshotAddVPN4

Now the VPN should start by clicking inside the nm-applet:

ScreenshotAddVPN5

Please also see the official pages (german):

http://tu-freiberg.de/urz-21
http://urz.tu-freiberg.de/urz/netze/vpn/index.html

Check if NetworkManager is running on Ubuntu / Debian

Usually you should be using NetworkManager by default (Ubuntu 14.04), just in case you want to be sure, use this command to verify:

dpkg --get-selections | grep network-manager

In case there is some output like:

network-manager					install

it is installed, if there is nothing returned, you are probably using a different network managing daemon.

It would be possible that network manager is installed but inactive. Lets check if its running the hard way:

ps aux | grep network-manager

If thats returning something different than itself, you can be sure using the NetworkManager in Ubuntu / Debian.

Save a list of installed packages on Ubuntu / Debian

In case your laptop crashes during your thesis writing it would be nice to have a list of which packets have been installed.

In Ubuntu / Debian or other some other distros there is a tool called dkpg which offers a small command that can be very helpful:

dpkg --get-selections | grep -v deinstall

Saving that list in your backup routine (e.g. of your /home/ dir) every hour using crontab (linux scheduled tasks)

crontab -e
#follow the dialog and add this line to your crontab
0 1 * * * dpkg --get-selections | grep -v deinstall > ~/packages.txt